Showing posts with label Bunk Beds. Show all posts

Sunday, November 7, 2021

Banner Elk Bunk Beds

 As we got furniture moved into the Banner Elk townhouse, it created an opportunity for me to build a lot more stuff. I started with a really cool quad bunk bed for the kids bedroom. It's got 2 fulls and 2 twins in an L-shape, I measured the back wall of that room and had only about half an inch to spare. Also, to be sure that there was enough room for grandmothers to get into the twins, I needed to move them forward. Again I measured the side wall to be sure I wasn't going to cover up a light switch or something. The void created by moving the bed I used to build in a nightstand. The end result is pretty neat. 

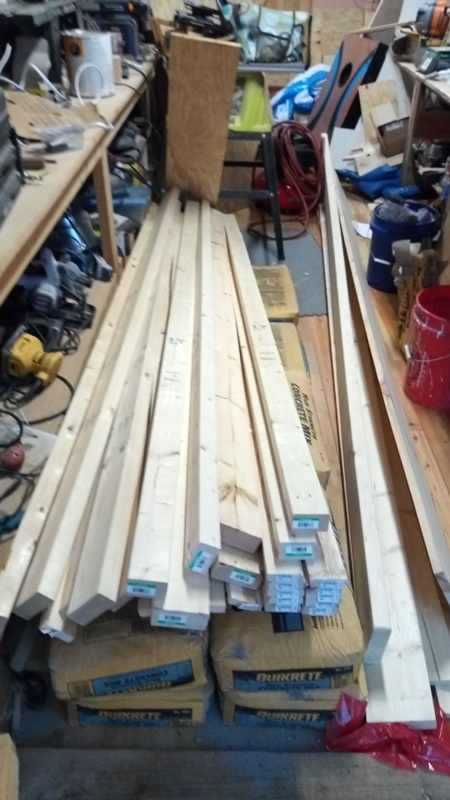
It always starts with a shitload of lumber into the shed


Started building the frames and cut all of the supports and slats to length

Assembling the frames

Assembling the supports

Rough layout of the finished product, full, twin, nightstand in the corner

All 4 frames

Assembling the bunks


Now with all 4 together and safety rails


Lena picked out the stain color and helped me apply


Loaded up and ready to head to the mountains. We also brought the fraud bed for the back porch

Installed! And my kids are super happy with them


So, 2 fulls, 2 twins, 2 happy kiddos. You can see how that room has a blocked off part where the chimney goes up to the roof, it created a space that I could fill with beds. There's no overhead light or fan in this room, so the light source comes from a lamp on one of the nightstands.

The first weekend we moved into the townhouse, this was in the first load of furniture that I brought up. I can't remember now if it was a thursday or friday - but I had to work a full, stressful day and only had one kid with me (the other was already up there with Kelley). After work we had to disassemble the beds, load up the truck, drive 4 hours to Banner Elk, then unload the truck at like 10 pm and build up these beds that night. Shortly after midnight I finished the assembly in place. Then we all 4 had to sleep in these beds, since they were almost the only furniture in the house at the time! But I can report that I slept like a baby after that. These are really comfortable beds and make a great use of the space

Sunday, November 15, 2020

Finishing a cool bunk bed

 I finished off a really cool bunk bed setup recently. It started with the same basic setup, making boxes on the frames, and making the supports. But they also wanted a climbing wall, a slide, and a few drawers.

Supports are in and this bunk is standing

The middle supports determine how wide I need to make the slide

This is the frame for the drawers

Drawer frame is installed, with the slides

Climbing wall is getting there


Slide is going together

This drawer came out a little small

I swear I had to build 6 drawers to get 3 to fit right

Now painted!

Hardware is installed


Getting my kids involved with the install

Lena really got into it

Finished! They loved it.

Drawers turned out pretty clean.


My helpers


The kid is a natural!


You can make cool bunk beds like this. Just take it one component at a time. This is a twin/twin bunk, standard twin mattress is 38" x 75", so start with a square box there. I use 2x3's for the core, cover it with 1x3 furring strips, then wrap the core with 2x6's. The supports are all made with 2x4's, cut a 12.5" length off of one end, and a 9" block off. The total height for this bed was 75", so I glued and screwed the 9" block 18" from the top, and the larger block flush with the bottom. The boxes then sit on top of the blocks, attached with 3 screws through the supports. Then I add a 1x4 and 1x3 to the top as safety rails, cut to length.

For the climbing wall, I glue & screw 2x6 boards to the end supports, then ordered the playground handles and holds from Amazon. They came with hardware to mount on 2" stock (which is really only 1.5" thick) so that was straightforward. The slide is tricky. I started with a couple of 2x6x8' boards, calculated the angle for the top & bottom cuts. Then I measured for 2x3's to go under the plywood for support, and cut a groove through the inside of both boards to hold the plywood. I used one sheet of plywood for the slide and the drawers. After cutting the plywood to size, install it into the grooves with finish nails. Sand the plywood so it gets smooth, I used 120 and 180 grit for this. Then I coat the plywood with some marine epoxy (TotalBoat) that I had hanging around. Install the 2x3's underneath for stability, so the plywood doesn't flex. Out of habit, I put them every 16" like it was a wall stud or something. I attach the slide to the upper bed with door hinges, they are heavy duty for the weight, and it prevents toys from getting stuck under the slide.

For the drawers, I built this frame that provided a front face and stability by screwing it to the supports and for the back it screwed to the bottom bed, creating a frame that was parallel to the floor. Then I put sides up so I could mount the drawer slides. The drawers are just boxes made of plywood and assembled with the finish nailer.  I put a 1x8 face on the boxes, and mounted the rest of the drawer slides. The important part there is to get the sides on the frame exactly parallel, and don't make the boxes try to fit exactly. Leave about 1/8" shorter than you think they will need so the slide can operate easily. 

This one really did pull out all of the stops, and the kid was so excited! I thought the slide came out a little steep. But really everything was clean, the parents were super happy with it.

Friday, October 23, 2020

Kicking off 2 new builds

 For some foolish reason I decided to kick off two builds at the same time. The first was a HUGE announcement - after a year I finally made a sale from my Etsy store! A full size hanging daybed in Oak. We had some communication to work out the final details and I went off to buy supplies. At the same time (same day, in fact) I had another order come in for a new set of bunk beds. Frames are frames, so I dove into both projects at the same time.

That's a lot of supplies


Frame for the hanging double

Parts for the bunks

One twin bunk


Two twin bunks

Notice how the slats on the hanger go to the edge - it gets wrapped with oak


You can notice a difference between the two types of frames. For the twins, the 2x3's are fastened to 2x6's, then the slats sit inside because the 2x6's get sanded to form the outside of the box. For the hanger, the 2x3's get the slats on top and that is the end of the frame. 

With the supplies, I tried a new lumberyard that several people told me to check out. Raleigh Reclaimed turned out to be amazing. Not super expensive like a bunch of the other lumberyards I've used, and not fresh off of the saw air dried stuff like the main lumberyard. This oak was planed and kiln dried all in house. They had massive amounts of mahagony and all kinds of other species that made me drool. So this red oak is really nice.

For my next trick, I'll have to start working this oak to get the stringers built for the hanging daybed, and then get to wrapping the hanger. Then, assemble the bunks and build out the rest of their parts.

Tuesday, September 22, 2020

Stephen's Kid

 My buddy Stephen at work wanted to get a loft bed with a desk and some shelves for his daughter, when suddenly he realized "hey, I know somebody who builds those things and I can get exactly what I want". So we talked through the design some, I looked at the cost for adding the desk & shelves and I was off to the races. Unfortunately, Stephen also had to have surgery on his back, but a different surgery and a different part of the spine, but he was very understanding when my back pain put his 2 week build into more like a 3 month build. Still, I think it fits in to one blog post. It's a full-size loft bed.

One loft bed, some assembly required

Rough cut is getting there

Supports are assembled and everything is sanded

Assembled the frame

Building beds on a hot summer day

Starting to assemble

Now with all 6 supports, the ladder, and the desktop


Added the safety rail up top


My work setup, complete with box fan (did I mention hot?)

Added the shelves


Woodworking is done

Primed, and I added a brace on the back side


First, I rough cut all of my lumber for this basic setup. Assembly for the supports and the box was next, then everything got initial sanding and assembled on the deck. The spacer for the middle supports had to be the width I had for the desk, I used a 1x10 for that, then put ladder steps on the outside. Once that was all assembled (and I cut the 45* angle braces) I added the safety rail and a top rail mitered at the corners. Even after all of that, it still racked forward/backward some so I added that other brace on the end. In the end, it gives the girl something to decorate, and she thought it was a trip. Here's the finished product, installed in the house:


The customer loved it, my buddy was very happy with the finished product and (most importantly) his kid was absolutely ecstatic. That's what I like.