|
| Let's turn this into some cabinets |
In the kitchen remodel, we decided to move the refrigerator to another wall inside of a hallway. That meant it was totally freestanding, sticking out into the middle of the space. And that means that we can wrap cabinets around it! Let's build cabinets!
I picked up 2 sheets of 3/4" plywood for the cases and a single sheet of 1/2" for the doors, all sanded on both sides for presentation. These were about $40 a sheet from Home Depot but totally worth it. I also picked up some 1x4 and 1x2 pine for the supports and face frames, plus baseboard and crown molding to finish off the room. The existing kitchen cabinets go all the way up to the ceiling and have very plain flat faces so it was easy to mimic the existing style.
The plan is to stand up two sides full length beside the fridge, and a short side above the fridge. Connect them on the back with a couple of anchors first, those can then be attached to the wall and one on the top and bottom to outline the front and anchor to the ceiling. Then attach face frames and doors. Also we lost a desk in this renovation, so build in a desk below the window as well.
 |
| sides are up and attached |
 |
| Added a toe kick and the front support |
 |
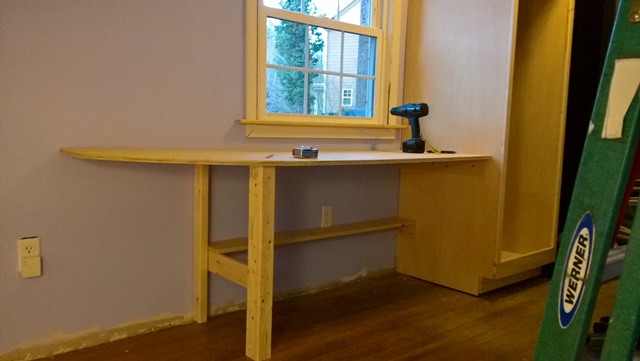
| left it a bit close to the window - that's the desktop cut on the floor there |
I cut the sides of the cabinets at 25" wide, and the desktop at 23" wide so I could get both out of one sheet of plywood. This left the second sheet with the same cut, the 25" wide cut made the 2nd side of the tall cabinet and the remaining 23" wide sheet was cut up for the cabinet shelves. I had to take some leftover 22/32" plywood to finish things off, but the end result came out pretty good.
 |
| Now with more face frames. That side closes to the door was scrap 22/32" |
 |
| The built in desk has a shelf below and a curved top |
 |
| The raw finished base project |
Since they run floor to ceiling now I had to build these before running baseboard & crown molding, which was really the last step in the construction for the remodel. and paint. So much paint! I also bent some wood to wrap the plywood edge of the desktop.
 |
| Now with more crown molding & paint |
 |
| The first door is installed on the built-in |
 |
| This main door opens to a broom closet |
 |
| My youngest (and the cat) approve of these cabinets |
 |
| The finished desk - we finished the top with a wipe-on poly |
 |
| Fits right in under the window |
 |
| Doors are hung over the fridge with care |
This was a straightforward approach to cabinet making, and adding these had a huge impact on the overall project. We love having the extra space in the kitchen, and the built in desk turned out better than I expected.