Wednesday, August 29, 2018

Walnut table II - the parts

After I had all of the boards cut up to rough length for the parts that I needed, everything easily went through the planer. I planed from 5/4 down to 1" thick. I tried to go thinner than that, but the planer just didn't want to cooperate. So this post is how I was able to shape the pieces into what I needed.

First I had two lengths of the board cut to size for the legs. Since I wanted 2" thick legs, I had to rip the boards into 8 pieces the same width (ended up being about 2 1/4"), then gluing them together to create four leg blanks.

Glued up and in the spring clamps

4 legs, 8 pieces
I had to get the glue joints exactly flat. I did this with a hand plane and the stationary sander. When they came out of the clamps they got the same treatment - planer and stationary belt sander. In the end you could not tell there was a glue joint there at all.

The top is extremely important to get a tight glue joint. I had to pick the best faces of two boards that work together to create one seamless top, then have the grain pattern look seamless so it doesn't create a jagged appearance. Then the glue joint has to be super tight. Any gap in the top will be incredibly visible. I used biscuits to ensure that the joint is flush, planed the edges flat, and put it all on the belt sander to be sure I had a smooth connection.

Top is glued up!

Damn! I still have a small gap on the end
You can see the grain pattern looks seamless across the joint, but there is still a gap on one end. I used a boatbuilding technique called a fillet to take care of that. Mix some sawdust collected from the belt sander with glue (I used Titebond III here, but use epoxy when you're working on a boat) until it thickens to the consistency of peanut butter. Use a scrap stick or something to force the mix into the gap, then sand it smooth when it dries. Since the color is actually the same as the regular wood, it makes the gap disappear.

Next I went for the sides. When the top and legs were out of the clamps, I started by picking the top of the top, then I could draw on the bottom. Didn't get a good picture of it, but I placed where I wanted the legs to attach so I could cut the sides to the final size. Then I wanted to use mortise and tenon joints to attach the sides to the legs, so I cut those on the table saw.

First I started with the tenons on the sides, cutting those on the table saw. This is an excellent opportunity to make some jigs to hold the boards in place exactly upright for the shoulder cuts, and at a consistent height for the cheek cuts. I did not take that opportunity, and my tenons turned out quite wonky and sloped.

Cut to length - 2 long and 2 short

Tenons cut and on the top

Now if only there were legs with mortises

There's some legs! All glued up and ready to shape

I routed a roundover on the top edges. can you spot the filleted gap now?

practically stable
I drew the outline of the tenons onto the legs where I wanted the mortises to go, then drilled them out on the drill press so I knew I had an exact 90* angle cut in. Squaring those up with a chisel was a lot of uncomfortable manual labor, but getting a snug fit in the end was worth it. I didn't cut mortises for the front because I wanted to make a drawer, so I just kind of let that sit until I could figure it out. But finally when the mortises were cut it finally starts to look like a table.

Also I went ahead and drilled holes for pocket screws using a Kreg jig, and cut a slot for the bottom plywood on the tablesaw. 

Dry fit, with pocket screw holes and a slot cut for a plywood bottom

Now with more top. Just a dry fit.
I wanted at this point to shape the legs. The table is a rectangle not a square, but I left some rough wood to build stretchers later and hopefully a shelf down there. Mistakenly, I acted like it was a square and cut some 45* chamfers into the legs. Symmetry is important here in overall table design. I started the chamfer 8" down from the top, so I needed to mount the stretchers 8" up from the bottom of the legs.  I only put the chamfers on two sides of each leg, so I had to be sure that the legs were properly oriented on the top at this point. Lots of design decisions at this point.

Tight glue joint, chamfered two sides

With a mortise cut in

Dry fit with shaped legs


From the leftover board that I had saved, first I ripped the two stretchers to width. Then I took the rest of it and cut the thickness down to only 1/2". Then I cut it into thirds to get the width of the shelf. I cut half lap joints (again, thinking I was making a square table - oops) into the stretchers to support the shelf. I wanted to notch the shelf into the stretchers but didn't have enough width for that.

The bottom shelf all glued up

The stretchers
I cut tenons on the ends of the stretchers, and added mortises 8" up from the bottom of the legs to get that symmetry. Really though, I screwed that up pretty bad. The mortises create a 90* hole in the legs, which is perfect for a square table. The half lap joint is cut again for some angles that might make sense if the table was square. The correct way is to assemble the legs first, and get them stable glued up with the sides. Then measure the stretchers and cut the tenons with the correct angles to the legs. Up next it's time to assemble and finish!

Sunday, August 26, 2018

Starting a walnut table

We added a couch. It's a big couch, an L shaped sectional sofa that's 10' long on each side. This couch has spurred about 17,538 other projects since we got it! The fabric clashed with the wall color, so we still haven't decided what color to repaint the living room. Somehow the couch led to the kids agreeing to switch bedrooms, so now I have to paint 2 other bedrooms and build a bunch of furniture for their rooms, including renovating the upstairs bath which prompted that shiplap wall from my last post.

We measured the couch at the store at 9' long, and that meant we had enough room on this one wall to fit the couch next to a red double recliner. How did that turn out you might ask?

before - we got rid of the brown couch on the left and the corner cabinet

The red recliner - almost - fits

The only corner that could hold the new couch
This left me with a size problem. The red double recliner would only fit upstairs in the guest bedroom if we got rid of the king-sized bed up there. Since my mom is the only out of town guest we ever have, and she only comes up once a year, it seemed safe to take the king bed down to SC to their house to free up the space. Then my eldest had the idea to move her bed upstairs and all of her furniture. But she wants to take all of the video game systems upstairs too so I had to paint the room, fix the baseboard, and wall mount a new tv. It's going to be totally bomb when I'm done, yes. Also I have to make that bathroom functional again too, hence that remodel.

The youngest daughter is still afraid to be by herself, ever. Like, she's almost a teenager and still won't go to into her own room alone. it's absurd. But she agreed that she would let the elder move upstairs IF I she got to paint the room pink, got all of her own furniture down there, and I custom build her a desk for makeup with lots of drawers and a big mirror with lights. She also wants a wall-mounted tv to watch youtube stuff. So there's that.

The wife thought if we were going to put new tv's in the other bedrooms, we should get one too. So now I'm up to 3 tv's, a bathroom remodel, painting 3 rooms and the bathroom, and building a desk. Plus moving more kid furniture than I had ever bargained for when we bought the damn couch. Meanwhile I have my brown recliner next to the couch (in the left of the bottom photo above) and no end tables that would fit appropriately between the two.

And since I was recovering from surgery I couldn't lift anything heavier than 10 lbs. This seems like a good time to build a table that is just the right size! Once I felt like I could safely lift a single board again, I went to a local Klingspor's woodshop in Cary. I was looking for something like Cherry or Maple, something that would give me a figured top. They ended up having some kiln-dried walnut that looked ok for $12/bf, but most of the stacks of that and other appealing (read: less expensive) lumber types were only in 12'-16' lengths. Then I stumbled on a stack of 8' or shorter air-dried walnut that was only $8 per boardfoot. It's all very rough cut, straight off of the sawmill stuff. I picked up 3 boards, and ended up returning the short one because I didn't need it.

My 3 boards
I wanted something at least 7.5" wide and pretty clear so I could glue up a 15" wide top, around 22" long. Then I need to cut out some legs, so I wanted to start with something thick. I ended up cutting 2 sets of legs and gluing them together to get the thickness I wanted. So I roughly cut the pieces to length out of the 2 long boards and got everything ready for the planer.

rough cuts!

one sweaty happy woodworker!

The table and sides are roughly cut to length


Out of the planer and starting to look like something I can use
My plan was to cut the top from 2 lengths and glue it up on a long side with biscuits. Then I could make a box for a drawer and some legs. If there's enough left over, make some stretchers between the bottom of the legs and maybe a shelf for down there.

In this project I wanted to try some things for the first time
- mortise and tenon joinery to get the sides into the legs
- dovetail joints in the box for the drawer.
- edge gluing a top
- side gluing for thickness in the legs

This is going to be a lot of fun.

Thursday, August 23, 2018

DIY Shiplap

If you've ever wanted to install some shiplap in the house then you should find a wall and go for it. I really liked the look of shiplap, but buying the real stuff is super expensive!

I don't think shiplap actually has anything to do with boatbuilding, but it could be used as a way to plank a boat. Clinker & lapstrake are more popular now. But imagine the exterior siding of a house, where rainwater has to roll down without getting back through the siding to the back of the exterior wall. It's just a rabbet on both long edges of a board. For exterior use, when the rabbet faces up and out, one board hooks under the rabbet of the board above it. Water hits the wall, and the worst it can do is get into the rabbet groove between the boards, but can't get back behind the siding.

For interior use it just creates a cool look with gaps between the boards. We can achieve this look in a variety of ways. I have a wall in a bathroom I'm currently remodeling that I decided to make into a shiplap accent wall. The first option is to buy some shiplap. But at $7.48 per board that was a no for me. In with the molding at Lowe's was a box of 4' stuff that said it covered 10sqft of wall space for $25, but it would take about 6 boxes of the stuff to cover my wall. Both are very good options if you want to pay for it. You could also buy a shitload of 1x6 pine boards and cut the rabbets in on the router, but that's a ton of work and still really expensive. I chose the cheap DIY shiplap method.

My wall is only 7'3" high and 8' long, but there is a roofline slant cut into it. So less than 2' of the wall is at full height. So you don't have to be a math major to know that 2 sheets of plywood is going to be enough to cover that wall. I had to rip out all of the existing drywall, there was a weird popout for part of the wall that I never could figure out why it was there. Turns out, the wide part was hiding a vent pipe. The end of the wall goes inside of a closet, and I wanted to  make the tiny bathroom feel bigger by putting these lines all the way into the closet space.

The wall behind that sink, with the weird kickout. It's not flat.

This closet had face framing that I had already ripped off.


If you already have a flat wall and don't want to rip out the existing drywall, you can get 1/4" thick plywood, or less. Rip it into strips 5 7/8" wide, hang it on the wall using a paint stirrer, or nickels, or something else consistent as spacers. Then paint the whole thing and it will look like real shiplap. I didn't have that, so I had to make thicker shiplap.

I started with two sheets (4' x 8') of 19/32" plywood. This is the first size over half an inch that was available to me at Home Depot. side note: HD has a much better plywood supply selection than Lowe's carries, but I genuinely prefer Lowe's for everything else. I probably could have used half inch, it's an interior wall, but I thought this would be more sturdy. And since I had to hang some major shelves inside of the closet I went for the extra thickness.

Step 1 is to cut the plywood into strips. Regular 1x6 pine boards are actually 5.75" wide. Add a rabbet on there and they will net a more narrow strip than that. Plywood is 48" wide. To account for the kerf of the sawblade you want to rip the strips at 5 7/8" wide to the edge of the sawblade. I messed up a few attempts at this before finding a good way to do it. My table saw isn't big enough to slide whole sheets of plywood across, so I had to find a better way.

In the end, the best way was to use an 8' long board leftover from another project as a guide. I used spring clamps to hold the board onto the plywood. Measure up from the inside edge of the sawblade on a circular saw to the edge of the bed and add that number to the 5 7/8" I need to end up with. For my skillsaw, that ended up being 9 5/8". For one of my cordless saws, the bed was exactly 4" offset, so I got great smooth cuts from a 9 7/8" clamp distance. No need to draw or chalk a line covering the exact spread, trust the guide. You get the same effect from a track saw. I measure 9 5/8" up from the edge of the plywood on each side, clamp the board down there with spring clamps, then run my saw across. There is a fairly new blade on there, but I didn't have any problems with chipouts or anything. Once the plywood got down to a manageable size, I could run it through the table saw.

After getting all of the strips cut to width, I tried to cut the rabbet out on the table saw. This almost kind of worked. Turns out I had to cut every board to length, and the better approach is to measure length, then cut the rabbet on the router. 

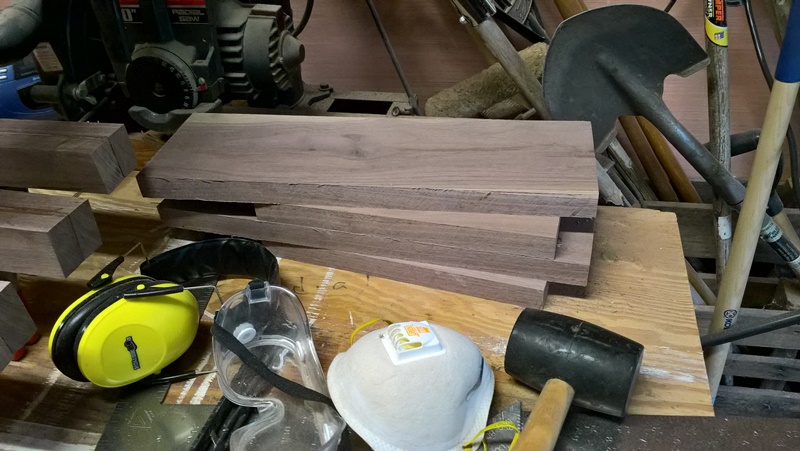
My stack of shiplap. That board on top had a bad cut, but only on one chunk of it.

Cutting rabbets on the table saw makes a bunch of sawdust
I had to furr out the studs to make the wall plumb. Turns out, my version of plumb was still pretty bowed, but I made it work. Really I should have just reframed by sistering 2x6's onto the existing studs, but that would have been too easy. I had scrap 2x4's to rip up. I also should have ripped down that drywall from the ceiling that was inside of the closet.

Getting the wall prepped
Now I had to cut my first board to match a slanted ceiling exactly so it was very difficult. On a square wall, you just nail on your first board, cut to length when you need to, and install from top to bottom. Just keep running one row below the next, and use the length left over from your cut to length from the last row to start the new row. That guarantees your vertical spacers will never line up. Since my wall was only 94" long, I never had any vertical spacers. Just cut out for the slope.

Important! After you cut each piece of shiplap, be sure to sand every surface. I went with a 120 grit on an orbital sander until the sander broke, then had some 80 grit on a belt sander. Sand the face and the edges! This is very important. The finished product will not allow you to sand the edges in bulk after installation is complete. Sand it before you install.

My first piece of shiplap is installed!
I used the scrap from that angle cut to draw the angles for all of the other boards that had to butt up to the ceiling. Work your way down one row at a time.

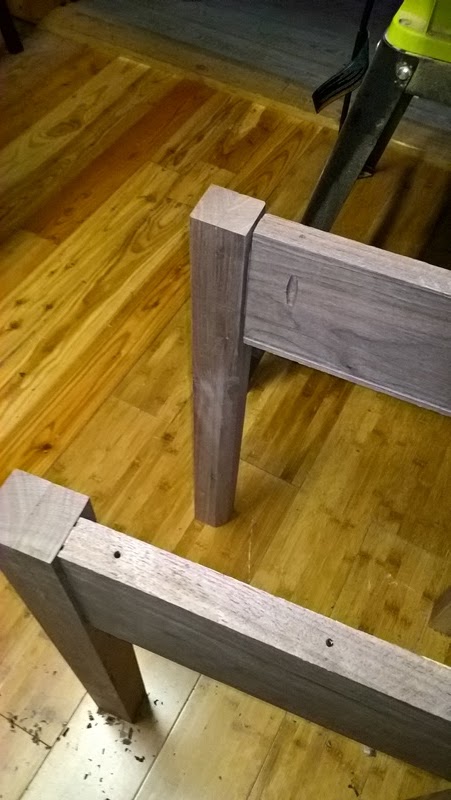
Two boards, one template for that angle. I did end up getting the top board to stay flush.

I added some extra support for the shelves on this side, you'll see why later.
This DIY shiplap is very forgiving when you have to work around other obstacles. I had to do some other electrical work. We are adding a medicine cabinet, and switched from one light above the sink/mirror that was there before to a teardrop light on each side of the medicine cabinet. Also had to cut around for an outlet.

cutout for the medicine cabinet and electrical for the light fixtures

cutout around the plumbing too

Getting there! One shelf support is up

Most of the finished wall with both shelf supports

I marked the drywall for where the shelf supports should be

I had to cut around the outlet too
Funny thing, the plumbing didn't stick out far enough to hold up to a flush mount so I just left a huge hole there. We're not putting the pedestal sink back anyway, going with a cabinet & vanity sink. So this isn't a huge deal, but does deserve some explanation.

So I made my own shiplap for $60 worth of plywood, and had enough leftover to cover that closet ceiling anyway. We made the closet bigger, 5' wide total. When we run the flooring and walls consistently into an open closet instead of the face framed stuff that was in the tiny closet before, it really made the bathroom open up. This bathroom is only 6' x 8' of floor space, with a shower & closet.

again working from top to bottom. Notice that massive gap in the drywall?

This ceiling has issues, but this scrap shiplap is better than the drywall that was there.

And now you see why  that shelf support was so important. this closet is now the guest bedroom
I made the shelves from rough cut 2 x 12 x 10' cypress, they are still getting finished and won't be installed until everything is painted.

And I mean paint everything. This plywood is sanded very smooth and it looks great as it is. But as with most shiplap, it's supposed to be painted. You want the shadows between the rows of boards to create the visual effect, and that gets enhanced when it's painted. We're painting this bathroom with a satin white paint, so after I finish mudding an taping up the drywall the whole thing is getting kilz primer and a coat of high hide white.

The look of this shiplap is exactly what I wanted. Sure I could have done a better job in framing, and I hate drywall, so my mud jobs are terrible. After I paint everything, I have to run some molding around the edges. We're going to put in some waterproof floor (or maybe tile?) down too with baseboard around it.

So you can totally make your own shiplap and hang it yourself. It's cheap when you use plywood and cut your own. Give it a try! Comment if you've ever done this.