Monday, March 12, 2018

Let's Make Frames!

The oak is through the planer - isn't that some kind of old country saying? Like "when the frost is on the pumpkin it's time for peter dunkin"? The stem laminations are ready to bend and the rest of the 5/4 and 4/4 planks are ready to cut into stems. Bust out the lofting board and let's go!

The lofting board has half of the frame drawn onto it. I want to notch down in the middle of each frame for the keel, so for each frame I need to figure out how wide the keel is supposed to be in that part of the boat, add a centerboard space, and add that length to the overall frame width. Be sure to account for the other half of the frame as well.

Frames are drawn on the lofting board to the outside edge of the frame, where the plywood attaches. Boatbuilding is such a surreal 3D process - pencil lines have to become the edge of a board with no width defined, just an edge. And even that edge is going to get planed to an angle so it makes flat contact with a bent piece of plywood - imagining the finished frame by looking at a pencil line on a piece of plywood is intimidating.

The first frame!

So proud
Frame 1 is the closest to the stem, so there is a crowned cross bar on top. These frames actually have 6 sides. The top is actually the last piece to cut. After starting with a straight edge, I cut it to length and then trimmed half an inch down from the top and used a batten to create a fair bend from the center to the edge. This will have to support the deck between the mast and the bowsprit, so a gentle curve will let water roll off. The bottom piece has to be really thick to support the weight of the boat, so I cut all of those from 5/4 material. It actually contains what I called 3 of those sides before - there is a center point that is flat and as wide as the keel for notching. Then from each side of that keel side mark, use the lofting board  to pull that angle together. So 3 sides on the bottom. Then you can cut the side pieces with angles. After everything lines up with the lines drawn on the lofting board, glue and screw all of the pieces together. wham bam, frame.

Frame 2

It's a bit wider
Frame 2 and frame 5 (the transom) both get plywood backing called a bulkhead. The side pieces on the other frames can leave a void, but with a bulkhead I had to fill in that void with some extra 1x3. The bottom is cut out of a 5/4 (1 1/4" thick) board that was about 6" wide and originally 12' long. Cut the bottom first, I had to use a center block the width of the keel, then cut the angles into the bottom. That will give you the angle and length of the sides, then when they are in place measure and cut the top. Frame 2 also has a top beam with a crown, the mast sits just inside of this frame so it has to support some decking as well as the mast step.

It's important to note that you don't use a tape measure for any of these cuts besides the keel spacer. Everything length and angle gets taken directly from the lofting board! It's such a surreal process.

Frame 3 - used a piece of scrap 1x3 to hold the bottom in place

Frame 3 and 4 don't have a top crossbar so I used these plywood scraps to hold spacers

This looks like frame 5

I might plane these some more later by hand. Still a bunch of gray showing here

Lofting board and the frames I built from it


All 5 frames on the strongback!

Eventually these will be standing upright
So now the frames are built! I still have to do part 2 of the stem, soaking/bending/gluing/shaping. Then I can attach the frames to the strongback with the stem, and start working on attaching the keel & chines. Then it starts to look like a real hull.

Finishing the frames is an incredibly cool first step!

Sunday, March 11, 2018

Stem Lamination, part 1

One of the boards I got in the white oak purchase was an 8/4 board about 9' long. There was a bow on there already, and it was really hard to get that guy through the planer. Eventually I gave up, handling a 90lb board by myself was just too much. I got enough of it through to see the main knots and checks. I needed to cut out about a 5' section of it for the stem. The rest I'll hang onto and make knees or a breasthook or something. Small parts, even the mast step & holder need to be made out of 2" thick stock, so the rest of that board is going to come in handy later.

So I cut off the checked end, then measured out 5' of clear stock and cut the piece that I needed out of the middle. To laminate the stem, I needed to then rip that board into strips. I ended up setting the table saw between 1/4" and 3/8" thick and ripped the entire board into strips. The finished stem needs to be 5" thick and the starter board is much wider than that, so I can afford to lose some to kerf width and still break some boards in forming the stem.

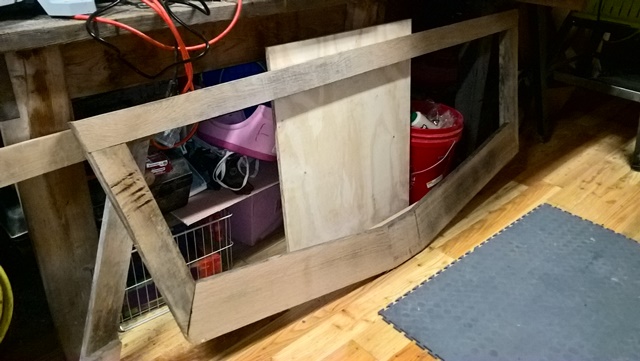
Stopped in the middle of a rip cut

Check out all of that sawdust on the ground. Ripping to a close edge is a difficult skill to master
The board was crowned, which presents an interesting problem. Getting square strips requires a flat board. I tried to solve this problem by swinging the board around and ripping from a different side each pass - that meant I'm finishing with the very center of the board. Still not entirely confident that I got square strips so I might run them through the planer to be sure.


Finished strips
Squareness aside, these turned out great. They are flexible and thin, but I'm still going to have to soak or steam them in part 2. To laminate, I'll have to bend these to a form that is currently just drawn on the lofting board. The finished product has to be in two parts with the same bend that come together to be 5" thick.

The rest of the board - over 9" wide

You can clearly see where the crown was taken down in the planer

The kerf on my table saw took the rest of that width - now it's less than 7" wide
Building a laminated stem takes several steps. This is the first step, cutting the strips. Bending a single board or cutting from a hackmatack  is another way to go, but you can't just cut a stem from a single wide board or you will end up with a "short grain" situation which will break. When you do use a single board you have to chisel a couple of angles into the side called a rabbet. Cutting the rabbet into the stem and keel is easier to accomplish if you keep the top & bottom parts separated.

Lamination is also a multi-step process. First you have to steam or soak the strips to get them wet and flexible enough to bend into the form. After they are bent & clamped in place they need to dry, then they will hold their shape when dry. Then you have to add plastic to control where the glue goes, and bend the strips into the form again, this time gluing the strips together. At a point, you need to add plastic separator instead of glue between two of the strips, then keep gluing the rest in place. This way when the epoxy has completely cured, you can remove the clamps and end up with two sections of curved strips that will hold their shape.

Cut the bearding line into one segment of the stem, and cut the rabbet line into the other side. This way, when you epoxy the two segments back to form one complete stem, you have a complete rabbet already cut in and you're ready to lay the plywood in there. This angle of the rabbet changes as the stem drops, so it's an incredibly complex series of cuts. Also you have to start with clean sides, and will typically cut an angle into front of the stem so it looks like the plywood from the body forms a point at the front. Here's a picture of the stem I cut in Quicksilver that shows the rabbet and the point

That was a straight stem so I could cut the rabbet and point on the table saw. This is going to be way more complex of an angle to adjust to.

So part 2 will be soaking, bending, and gluing the stem. The same type of rabbet has to be cut onto the keel as well, and I'm using a single 2" thick board for the keel. That's going to be a mighty complex cut as well. Then the keel and stem have to be joined together, and the frames notched to accept the keel. Hey, I better build some frames and find that keel board...

Thursday, March 8, 2018

Starting the patio

I need more warm dry days. There really hasn't been enough of those lately to pour concrete. and I really, really do want to pour concrete. This fountain is supposed to be part of a patio, and it needs to wrap back around to the new deck. I wanted to use some of the pea gravel that I had leftover from the walkway on the other side of the deck, and the stepping stones that we found laying around the house already. I got started.

Fountain, a/c, deck access point, storage

Another angle to the stepping stones & deck stairs

Tied into the backyard
My plan is to pour concrete between the stepping stones, then sprinkle the pea gravel on top to give it the same color/texture as the path on the other side of the deck, but a more stable structure. Then add a flat concrete pad outside of the stepping stones to complete the space. I want to add a curved edge in there too.

I had 3 bags of high strength concrete from Lowe's to start with, so on one dry day I finally got to pour them. You wouldn't believe how little coverage I actually got from 3 bags.

added some pea gravel to the base
Finished area topped with pea gravel
 I really love the way this part turned out. If I had more than 3 bags of concrete I would have kept going, the end result is pretty smooth. Of course not all of that gravel stuck after it cured, but I expected that. The end result is what I was looking for.

Now I've got 5 more bags of concrete in the shed and no dry days that are above freezing to actually pour it. Come on mother nature!

Tuesday, March 6, 2018

Finally, some Oak

I finally found some air dried white oak at a farm on the north side of Durham! I got to go up there, check out what this guy had, and buy what I wanted. Turned out, this was pretty fantastic.  He used to own a portable sawmill, so the manufacturer had the farm listed as a local sawyer in NC. Tom didn't even own the sawmill anymore, but he still had plenty of lumber laying around!

12' boards in a 6' truck bed

Such a cool farm!

Lots of oak

needs to dry

My shop is too small!
This stuff was gross. The farm had a fenced off area where the lumber was off of the ground but still uncovered from the weather. And there was still horse poop everywhere so it wasn't always fenced off. Apparently it's been out there for about 2 years. So I need to let it dry indoors, then plane/sand off all of that gray stuff that got on there to get some clean boards. At least clean enough to draw frames with!

The lumber is all 12' long, except for one 8/4 board that was only 9'. The rest was 1x3, 1/6, or 5/4 x 6. Thanks to that much weather exposure, it all needed to be planed down before being usable lumber.

Tom also has some 18' and 20' boards of 8/4 that I need to go back and get. Really want to get one for the mast and one for the keel. They are also going to need some work on the planer though, and that's going to be tough.

Going through the planer, check out all of those shavings

Dirty boatbuilder on the planer
This is my first time working through white oak like this, first time using a planer, first time starting with rough stock. The stuff you get from Lowe's is already clean, straight, usually square, kiln dried and very consistent. This time I have to work up the wood to get it into the kind of shape where I can build frames, then clean it up more so I actually have a good looking sailboat. Total cost of these materials was $105, it was around $1.75 a boardfoot. That's really low, and I am lucky to get this good of a deal. These boards are totally solid on the inside, it's great stuff. A real hidden gem.

Sunday, March 4, 2018

The Final Kitchen

After getting the crown molding up, I got the cabinet doors hung, touched up the paint & caulk as much as I could, then finally had to walk away. I do still have to build a couple of drawers, but I need to clean some other projects out of the shop first. So let's call this final walk through of the kitchen remodel complete and try to get back to some boat building.

So when you walk in from the driveway to the mud room, let's begin with that view

Up the stairs to the new hallway

Stairs were moved forward, flooring updated, molding, baseboard, crown, corner cabinet

The built in desk turned out great! Check out that bent wood edging around the ply top

Doors are hung with care

New cabinets fit great

New door, frame molding, crown, side cabinet

Open view from the hallway into the kitchen, crown molding

Former fridge nook, still needs 2 drawers
There are still some stitched pics hanging around that really illustrate the change

Still in progress

From the other side, it really opens up

Here's the before & the finished opening
This project really does have a massive impact on the house. My parents think it's the biggest impact on anything we've done so far. I'm inclined to agree, but that deck & screened porch are pretty great. Now it's just as comfortable walking through the hallway as anywhere else in the house instead of the cold freezer that it used to be. I like the color, the visual of having the space opened up, and all of the extra cabinet space we gained. This was a really great renovation. Total cost for materials was around $1500 but it added thousands in value to the house.