Wednesday, March 18, 2020

More Bunk Beds

A buddy from the office said he wanted some bunk beds for his kids, a twin over full standard combo. I had a twin box already made up from a previous project so all I had to build was the full & supports.

Built the full on the frame

Built the supports (next to the countertop oak)

already had the twin in the shed

Got it standing on the deck!


adding the safety rails & ladder steps

This is pretty much the finished product, still needs sanding & paint


Finally I did get some paint on it and get it installed. One of Shawn's kids is 6'4" tall (as a teenager) so I made this one taller than most of my bunks.

There was a really high arch ceiling!


Finished and installed
These beds are modular, in that there was only 4 parts plus a couple of rails for the top. when Ella and I installed these we ended up putting the ladder on the other side of the bed, and everything was still fit and secure.

Bottom line is that this was a quick win for me, Shawn's family is super kind and the kids really love it. This is the kind of project where everybody wins!

Sunday, March 15, 2020

Finish the Queens

Eventually, finally, I finished building and fitting all of these dang drawers. The install went pretty smooth after that!

Finished off this bank!

Getting there


The top bank is going onto the white bed and the bottom bank is for the whitewashed bed, if that wasn't obvious. The whitewashed drawers turned out really cool, you can see the grain pattern show through, but the faces form a continuous grain. I numbered the faces and where they go in the cases. Time to install! These banks of drawers sit on top of a couple of 2x4's on the floor and I left exactly enough room under the bed for that. sure.

We had some fun helpers

She had 17 pillows on top of the bed

I can't even

These drawers and nightstand fit! really

got the bank and nightstand on this side too

notice the gap between the nightstand and the platform rail that shouldn't be there


Put some paint on the frame

This turned out amazingly cool

The drawers went into the other bed too

Notice the Toby photobomb


With Ginny and Sam, the customers. Such a sweet, kind family
These beds turned out to be amazing! Don't think I'm going to take on a project this size again anytime soon but these are definitely some of the coolest beds I've ever made. 2 queen beds, 4 nightstands, and 28 drawers in total - all cool.

Friday, March 13, 2020

Dock Flooring

Recently, my mother-in-law fell through part of the dock at her lakehouse. The deck flooring was just regular 2x6 pressure treated boards, but these were put in when they built the house 30 years ago. So it's time to replace some of this flooring. We didn't really know how much, but the section where she fell through is in full sun and is a diagonal section that is 18' across on all sides. I'm not going to do the calculus on that one, just call it very large.

Stripped down to the framing

Notice the giant knot in my forehead


The finished dock floor
The worst part of this was removing the old deck flooring. It was put in with spiral nails so that rotten wood was impossible to get out. Twice I actually snapped off a piece of the board that flew up and hit my face - once across my left eye and once in the right side of my jaw. This was unbelievably painful and dangerous. If I lost an eye to this stupid dock I would be more pissed off than any other way that could happen. I brought my air compressor and framing nailer, so I used 3" coated galvanized nails to put the new flooring down. Let's hope this holds up for a while. Eventually I'll have to get down there again and replace more of the dock flooring but I'm hoping to hold off until the weather cooperates, which is roughly when hell freezes over (I'm not a fan of going to SC)

Wednesday, March 11, 2020

All the drawers

So those two queens I was working and delivered on Christmas Eve. I still had 26 out of the 28 drawers to build, plus lots of casings, a couple of nightstands, and some finishing to match. Building half of a project at a time is challenging, but building halves of two projects is nearly impossible to get right. But it had to be a Christmas surprise for the kids, so we did what we had to do. Now, it's time to do the rest.

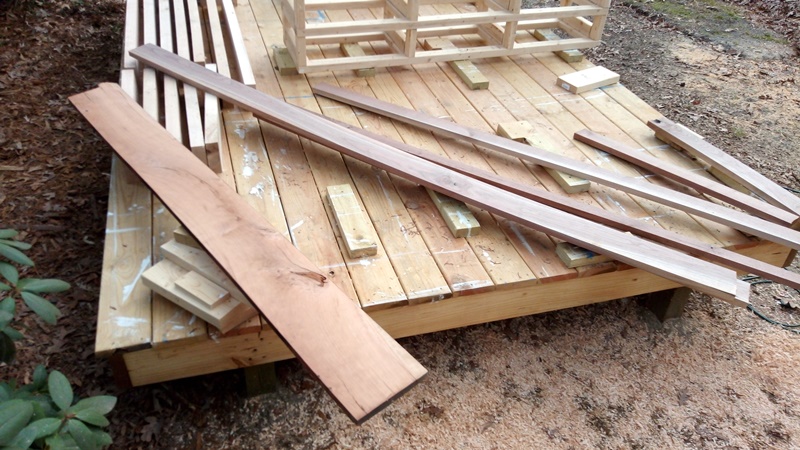
All 4 casings laid out on the deck

Now with more 2x4's

Nightstand #3

Check out those drawer slides

The other nightstand is coming together
I made a storyboard to setup the case layout. Using pocket screws, I put the flat parts of the cases together, then attached the verticals and the drawer slide holders with more pocket screws. After I put together 4 cases that hold 6 drawers each, I attached the drawer slides into the sides of the case openings. Each drawer slide is 16" long,I built the casings around that. Each drawer opening is supposed to be the exact same width, but they were not. So once I had the cases built it was time to start building the drawers.

The key to the cases is that the sides have to be *exactly* parallel for the drawers to fit right. Since the slides were 16" long, I ripped some plywood into 5" strips and cut them exactly 16" to length, so I got 6 drawer sides out of each strip. Then I ripped some wider strips of plywood. If I measure the distance between the inside of the slides and subtract the thickness of the plywood sides I get the length of the plywood for the front & back. I cut that to length once, then ripped 2.5" off of the width, so I get both the front & back out of one piece of the strip. Then I attached the sides together with a finish nailer, cut & size the drawer bottom, nail it into place, and attach the drawer face. Drill a hole for the drawer pull and attach the rest of the drawer slide. If the sides of the case are parallel then it should fit right in.

Cases and parts stacked up in the shed

I had a totally rad cut station setup for the drawer parts

First drawer is done!

Then I finished up the first bank


Drawers are, in general, the most boring part of woodworking. This is the last time I will take on a project with this many drawers. You have to be very exact when you make them, they take forever, and if the case isn't perfect then you get nothing but trouble. These are turning out nice, but taking forever to finish. Next time...

Monday, March 9, 2020

Starting some countertops

Kelley has always hated the ceramic tile countertops that were here when we bought the house 10 years ago. Replacing them.... we got a $1600 quote from Lowe's for granite or quartz. Then I went to the local American Woodyard, they had 16' long 2x6 oak planks for just over $20 each. $104 and I had my countertops ready to be assembled. Butcher block coutertops for the win!

I basically needed 3 sections cut up, well really 4 but one is only about 4" wide. So I had to cut those 16' boards into 8', 4' and 3' sections, roughly picking the best sections out of each board. Those things (whole) weigh about 150 lbs each so it was not easy to move around, and the final assembled products were going to be heavy.

16' board in a 20' shed
this stuff is rough cut coming off of the sawmill. The sawmill guy said people normally use those things for barn framing. I started by squaring the ends, then cutting my sections to length. Then I had to rip those things to a rough width on the table saw and run them through the planer. I needed about 25" wide for the final product with all 5 boards edge glued together. The boards all had to be exactly the same thickness for the glueup to be flat in the end. Needless to say, it made a bit of sawdust

That's all oak planer shavings

Sections are cut, ripped, and planed

Also ran some walnut and cherry though the planer - multicolored shavings! So pretty!


That walnut & cherry lumber as well - future projects
I found out just how green that was at that point - it needed time to dry. I bought it on Dec 6, and planed it down Dec 28 2019. Also during that time I built more than a few beds. We'll pick up the countertops again in 2020