Tuesday, September 22, 2020

Stephen's Kid

 My buddy Stephen at work wanted to get a loft bed with a desk and some shelves for his daughter, when suddenly he realized "hey, I know somebody who builds those things and I can get exactly what I want". So we talked through the design some, I looked at the cost for adding the desk & shelves and I was off to the races. Unfortunately, Stephen also had to have surgery on his back, but a different surgery and a different part of the spine, but he was very understanding when my back pain put his 2 week build into more like a 3 month build. Still, I think it fits in to one blog post. It's a full-size loft bed.

One loft bed, some assembly required

Rough cut is getting there

Supports are assembled and everything is sanded

Assembled the frame

Building beds on a hot summer day

Starting to assemble

Now with all 6 supports, the ladder, and the desktop


Added the safety rail up top


My work setup, complete with box fan (did I mention hot?)

Added the shelves


Woodworking is done

Primed, and I added a brace on the back side


First, I rough cut all of my lumber for this basic setup. Assembly for the supports and the box was next, then everything got initial sanding and assembled on the deck. The spacer for the middle supports had to be the width I had for the desk, I used a 1x10 for that, then put ladder steps on the outside. Once that was all assembled (and I cut the 45* angle braces) I added the safety rail and a top rail mitered at the corners. Even after all of that, it still racked forward/backward some so I added that other brace on the end. In the end, it gives the girl something to decorate, and she thought it was a trip. Here's the finished product, installed in the house:


The customer loved it, my buddy was very happy with the finished product and (most importantly) his kid was absolutely ecstatic. That's what I like.

Friday, September 18, 2020

Old and New

 I have an old radial arm saw that has been used as a workbench for a long time now. It's been in conflict, a useful storage area that became the "catch all" in my unorganized shop. This saw was in my dad's shop, I got it from him around 2001 and neither one of us changed the blade. It stuck out a foot away from the wall farther than the rest of my workbenches, I never used it as a saw and it was constantly in the way. So, time to get rid of it. Eventually I'll build a real workbench with some vices and dogs to replace it as the catch-all or an actual workspace.

You will still be missed, old friend

For the new, I got to pour some more concrete. I think the real culprit behind my back injury was mixing about 80 of those 80 lb bags of quickrete by hand in a wheelbarrow so far for this sidewalk, so I finally bought a 1.5 yard electric mixer. It wasn't always the easiest thing to use, Kelley had to lift the bags into the mixer, and we couldn't exactly drop the rete where we wanted it, but we did get a few more sections of sidewalk poured.

We had to rig some lumber to get it in the right place


Still, new concrete turned out ok

Also poured a couple more to reach the other bed

So the old was saying goodbye to a saw that I've had for almost 20 years, and the new is 4 more sections of sidewalk getting poured. We're getting close to the driveway and it's getting fun. But I'm really ready for this back injury to go away at this point.

Wednesday, September 16, 2020

Sizzle before the Steak

 So I know we haven't finished planting out the bed beside the sidewalk that I haven't finished pouring yet, but Kelley wanted to get the landscape lighting up anyway. I mean, she's not wrong, we ordered everything we needed so since the parts were all there we could throw it all up there. 

Lighting up a sidewalk that doesn't exist yet

Turned out pretty good!

Uplights and path lights


At night you can really tell it's working

Low voltage landscape lighting starts with a transformer. I had to plug the new transformer into the new outlet that we ran before I started pouring concrete. We bought a 300 watt transformer from Amazon, along with 100 ft of 14 guage low voltage wire. I had to run low voltage wire through the conduit with the rest of the wire before we started pouring concrete. We planned to put 2 uplights on each of the 3 feature trees (only 2 of which are now planted, the red and green japanese maple), and path lights that match the mission style light we have over the front door. We didn't buy enough to do the path on the other side of the stairs, that would have to come later. It's also important when installing the lights, don't trust the clip on connectors that come with the lights. We picked up some waterproof wire nuts from Amazon too, they have a blob of caulk on the inside that activates when you poke the wires through. 

To size your transformer, you have to add the total number of lights you want to add, then plan 20 watts per light. The longer the wire is, you'll also need to add more watts for that if you're planning. We thought it would take 12 devices, so we needed 240 watts, but since the chain would end up being over 100 ft long we wanted to go a little stronger. The 300 watt transformer ended up being the right size for us, there was no loss by the end of the line. That was also the most expensive component.

In total, the transformer, 200 ft of 14 ga wire, 8 path lights, and 7 up lights ended up costing us about $400, but the sizzle that it adds is priceless. Adding landscape lighting is a genius way to add curb appeal. Here's the finished product:

That's lit, as the kids say


Monday, September 14, 2020

It's Yard Time

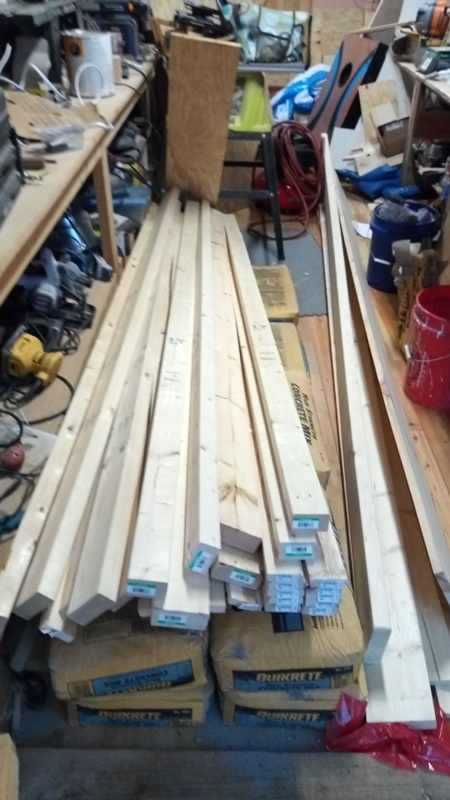
 After pouring all of that concrete for the sidewalk, and planting out the bed by the road, it really has defined the part of the landscape that should be grass. Only problem is there's not a lot of plantable dirt there, it's all at the wrong elevation after the concrete went down, there is a large bed that still needs to be graded and planted, and of course, more concrete to pour.

The big reveal here is that this yard grading & seeding happened over Memorial Day weekend. All of that concrete actually herniated a disc in my back, I think. It started feeling bad then, so I thought running the tiller to grade the yard down and get the grass planted while it was still spring-like would be a good idea. I thought it was bad (my back pain, that is), but then it got so much worse. After this, I couldn't sit upright without some extreme pain, so I went to the chiropractor - my usual first step. He said I might need a Prednisone dosepack from the family doc so I went there the next week. Took the dosepack, got no relief, doc said I needed an orthopedist. So the next week went to see the ortho, he ordered an MRI. The next week the MRI showed an L5/S1 disk herniation. Basically a couple of vertabrae came together and pinched off a chunk of disc, and that floating chunk was shoving pressure onto the sciatic nerve that sent shooting burning pain all the way down my left leg and my left foot is numb. It took 5 weeks to get the options. I ended up getting acupuncture, 9 treatments and it had the symptoms almost completely gone. 95% gone. Then later it came roaring back about 3 weeks ago, and round 2 was much worse than the original. I had about 3 weeks of relief where I still couldn't actually do anything, but I had other people doing the dirty work for me. When round 2 kicked in, I couldn't stand up or sit upright. I was prone on the couch and that was all I could do. I could walk about 10 steps to the bathroom, but afterwards my left leg would not be able to support my bodyweight and I would spend the next few minutes crying on the bathroom floor until I was able to recover and get back to the couch. And that was the extent of the world for about 10 straight days. Eventually I did get a 2nd MRI, followed by surgery this past friday, 9/11/20. The surgery removed the floating chunk and the pain was instantly gone. Now the incision site is still a bit inflamed, but it feels so much better, and 6 weeks from now I'll actually be able to get back to woodworking and landscaping. Until then I'll just keep blogging about the stuff that is already in the queue. But this entire summer was shot thanks to a back injury, and I'm done running for good thanks to the nerve damage in my leg. 

For the yard, I started with the tiller. We have a ton of clover growing, but not as much grass as I would like. The stone walkway had to finally all get removed, and I wanted to have solid grass across the entire yard. The boat that was on the stone walkway got moved to another part of the yard, and I accommodated that with the grass area. Also there was a lot of mud and clay that got removed when I built the porch that kind of rounded over outside of the sidewalk. Nothing will grow on this stuff, so I have to grade it down and chop that clay into the better topsoil, and use that to fill in the ditch left by the stone walkway and the drainage ditch that got buried. After that I spread centipede seed and covered the whole thing with wheat straw. 

Graded the soil down to the concrete

Raining in my tiller job

New drain worked great

I need some rocks for that downspout


Finished tilling up the weird parts of the yard

Straw is ready to go, I used 4 bales


Straw is down and watered in

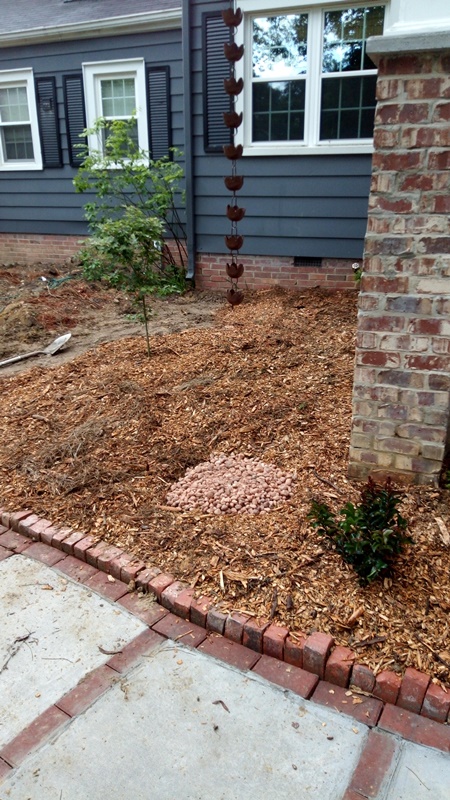
Mulch borders the sidewalk and grass


I kept trying to get the right angle

We also bought and planted a weeping cherry tree!

The new street view


Also added the yeti back to the bed

That's not a bad way to spend Memorial Day weekend, really. I wanted to get more of the sidewalk poured before planting the seed, but I also wanted to plant the seed earlier in the spring than that. It was great to be able to use more of the chips to mulch those beds. And I'm sure having too much clover in the yard means something important about the soil PH, but I'm not sure what that is. I know the clover kept clogging up my tiller - that was painful. And I know over the summer, while I was down with a bad back, the grass kept growing, and it turned out great.

Friday, September 11, 2020

Planting the new beds

 Now that the trees are down we can plant out the large bed beside the road, and as we pour more of the sidewalk we can plant out the large bed next to the house. We've been sort of stockpiling trees in containers until we had the right place to put them, and we found some crepe myrtles that haven't been available before. it's amazing to me how long you have to look through local nurseries before getting some affordable crepe myrtles that have the right growth habit, height, and flower color. My kids actually got really picky about that.

Added a Thuja Green Giant inside of the corner where the drainage ditch goes under the street

dwarf crepe myrtle fills in the space between the brick wall and the brick edge

The whole bed - 4 crepe myrtles, orange dragon, thuja

L-R, azalea, crepe myrtle, rosemary, orange twisted dragon

Although out of focus, this is a Hardy Orange called Twisted Dragon

more crepe myrtles

This is a red maple named "Flaming Sword"

Have you ever had a named tree before?

The major features are planted out in this bed

This green japanese maple was live harvested from Mt. Fuji in Japan

Last year I placed an order from MrMaple.com and got a couple of trees. We already have a large red japanese maple so I wanted to add a green one. They ship 2 trees per box, and they make trips to Japan every year to keep up with maples. They have a few green jap maples that they live harvested from Mount Fuji so I jumped on one of those. Then I found a contorted tree called Twisted Dragon - how could you resist that name? it's an orange tree that is supposed to bear fruit when it gets big enough. We let both of those trees grow in containers for a year until we found the right place to plant them. I put the orange tree next to the driveway and the green jap maples in the big bed near the house, it creates symmetry with the red jap maple.

 There is a well known red maple tree in Raleigh called Little Lake Hill. It is the most spectacular fall color of any single tree in the area. Every now and then the owners will clone the tree and sell the clones, and they are all just as brilliant as the original! All of the trees are named, our clone came from a tree named Scout, and we named ours Flaming Sword after a red paint color we have used several times. Have you ever owned a named tree before? I think that (and the story behind Little Lake Hill) are really cool.

We wanted to plant a long row of crepe myrtles along the roadside. It's a fairly common practice in this part of the south, but we wanted trees that would get at least 20 feet tall, not be too bushy, and have pink flowers. We finally found 4 of these that fit the criteria, and they were only $16 each at Lowe's so I jumped on them. We had to leave those plants in their containers bedded against the house until the big pine trees came down, then I could plant out that entire bed.

The only thing I really insisted on was having a Thuja Green Giant anchor the corner of this roadside bed. There is a drainage ditch that runs beside the road, and another that bisects our front yard. Where they come together creates an inside corner. My favorite landscape items to plant are evergreens, ornamental grasses, and flowering shrubs. Kelley's absolutely least favorite landscape plants are evergreens, ornamental grasses, and some flowering shrubs. I had to fight for my Thuja, but I got one.