Showing posts with label Queens. Show all posts

Sunday, March 15, 2020

Finish the Queens

Eventually, finally, I finished building and fitting all of these dang drawers. The install went pretty smooth after that!

Finished off this bank!

Getting there


The top bank is going onto the white bed and the bottom bank is for the whitewashed bed, if that wasn't obvious. The whitewashed drawers turned out really cool, you can see the grain pattern show through, but the faces form a continuous grain. I numbered the faces and where they go in the cases. Time to install! These banks of drawers sit on top of a couple of 2x4's on the floor and I left exactly enough room under the bed for that. sure.

We had some fun helpers

She had 17 pillows on top of the bed

I can't even

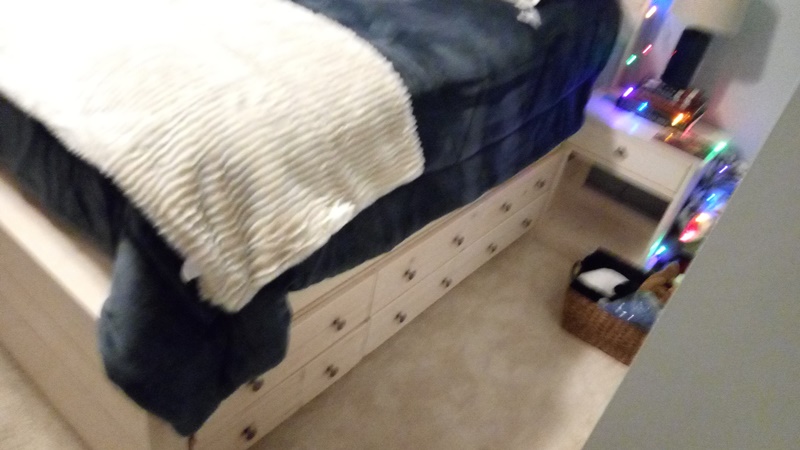
These drawers and nightstand fit! really

got the bank and nightstand on this side too

notice the gap between the nightstand and the platform rail that shouldn't be there


Put some paint on the frame

This turned out amazingly cool

The drawers went into the other bed too

Notice the Toby photobomb


With Ginny and Sam, the customers. Such a sweet, kind family
These beds turned out to be amazing! Don't think I'm going to take on a project this size again anytime soon but these are definitely some of the coolest beds I've ever made. 2 queen beds, 4 nightstands, and 28 drawers in total - all cool.

Wednesday, March 11, 2020

All the drawers

So those two queens I was working and delivered on Christmas Eve. I still had 26 out of the 28 drawers to build, plus lots of casings, a couple of nightstands, and some finishing to match. Building half of a project at a time is challenging, but building halves of two projects is nearly impossible to get right. But it had to be a Christmas surprise for the kids, so we did what we had to do. Now, it's time to do the rest.

All 4 casings laid out on the deck

Now with more 2x4's

Nightstand #3

Check out those drawer slides

The other nightstand is coming together
I made a storyboard to setup the case layout. Using pocket screws, I put the flat parts of the cases together, then attached the verticals and the drawer slide holders with more pocket screws. After I put together 4 cases that hold 6 drawers each, I attached the drawer slides into the sides of the case openings. Each drawer slide is 16" long,I built the casings around that. Each drawer opening is supposed to be the exact same width, but they were not. So once I had the cases built it was time to start building the drawers.

The key to the cases is that the sides have to be *exactly* parallel for the drawers to fit right. Since the slides were 16" long, I ripped some plywood into 5" strips and cut them exactly 16" to length, so I got 6 drawer sides out of each strip. Then I ripped some wider strips of plywood. If I measure the distance between the inside of the slides and subtract the thickness of the plywood sides I get the length of the plywood for the front & back. I cut that to length once, then ripped 2.5" off of the width, so I get both the front & back out of one piece of the strip. Then I attached the sides together with a finish nailer, cut & size the drawer bottom, nail it into place, and attach the drawer face. Drill a hole for the drawer pull and attach the rest of the drawer slide. If the sides of the case are parallel then it should fit right in.

Cases and parts stacked up in the shed

I had a totally rad cut station setup for the drawer parts

First drawer is done!

Then I finished up the first bank


Drawers are, in general, the most boring part of woodworking. This is the last time I will take on a project with this many drawers. You have to be very exact when you make them, they take forever, and if the case isn't perfect then you get nothing but trouble. These are turning out nice, but taking forever to finish. Next time...

Wednesday, February 19, 2020

2 Queens II

Coming into some crunch time around the promised Christmas Eve install for these queen beds, we had some bad weather and my wife's birthday is in December as well. I did what I could do when I was able to do it. It starts with building out the nightstands and trimming out the platforms.

Now you can see how this whole thing fits together with the nightstands and drawers

hard to tell, but I got the trim all done for this one too

You can see the bottom spacer 2x4 here, and the nightstand shell

Got the other headboard trimmed out top & sides

and the parts to trim out the rest of the platform


To build out the nightstands, I start with the basics. The side of the nightstand has to come up to the top of the box. The box gets a trim board on top, and that's the same thickness as the top of the nightstand. The width I used 2 1x6's side by side. I wanted to put one drawer in there with an open shelf down below, some nightstands would be all drawers. It's not huge, but you could put a lamp, a drink, and a stack of books on there. The height on the bottom shelf is set by the 2x4 on the floor, so I supported it with a couple of other 2x4's under there. I wrapped it in a 1x4 trim. For the drawer casing, I used 2x6 scraps to form the drawer case sides, it also let me nail the top and the outside together. The hard part about building drawers is getting the sides exactly parallel. Since the nightstands have to detach with just a couple of screws I had to come up with some kind of base for the drawer too. And the face frame for the drawer needs to wrap flush and still allow free movement of the drawer.

The rest of the trim is straightforward. The headboard gets 1x3 to wrap the top and sides, then the footbard gets 1x3 on the sides and a 1x6 on the top to cover that much depth. I made a 45* cut on the nightstand top and the same cut on the 1x6 footboard top to trim out the sides. The entire platform has a nice wide level surface. that turned out to be my favorite part of the whole project.

It's a pocket hole party!

Cut another drawer casing

The drawer fit under the trim

The youngest on the sander getting ready to paint

Got both kids out to help
To make whitewash, you mix up 1 part of primer and about 3 parts water. The mix is different every time you add primer or water, so be sure to make up enough to cover the entire project. I had to cut all of the drawer faces for this one, which meant finishing the second drawer casing first. Then I cut the drawer faces so I could whitewash them along with the rest of the bed. Then I put on 2 coats of Old Masters - Masters Armor protective finish to seal up. That stuff really dries fast and hard, I really like it.

The other bed got painted white, so it didn't need the drawer cases finished first. However the trim was all edged with an Ogee bit, so I had to cut the tops for the nightstands and route those edges so the curve would be consistent. Having my 12 year old daughter holding a board in place so I could route a curve (she was in no danger - it was totally safe) has got to make this the strangest Christmas Eve ever.

After the paint dried, Ella and I went to install

The white bed - note where the nightstand should be

Detail on that ogee edge routed into the platform

This is already a really cool bed

The whitewashed bed turned out fantastic too

Client picked up the drawer pulls


This turned out great, but took way too long to install on Christmas Eve. Now I have to build the other 2 nightstands, the other 2 drawer casings, and 26 more drawers all without the original beds to size anything. this is going to be fun?

Sunday, February 16, 2020

Starting the Queens

This project turned out to be one of the coolest things I've ever built, but the long road to get there means it probably won't happen again. The family that bought these was amazing, really the kind of people you would naturally bend over backwards to make them happy because they are so freaking nice. Originally they wanted a Full loft, then a queen loft, then in the end we decided on a tall queen with storage, but 2 rows of drawers instead of just 1 to make it even taller. Then build in a nightstand on each side as well, and make the supports a well-designed headboard and footboard, make the whole thing act like a platform. Oh, and then at the last minute, they doubled the order and wanted 2 beds exactly alike except for the finish (one whitewash, one paint) and the headboard height. Both beds are in rooms where the ceiling slants down into the wall, and I want the headboard to hit 2" below that mark each time, but the walls are different heights.

Two queen beds, some assembly required

stacked and ready to cut


two queen boxes
I started with the boxes, as usual. I didn't have the forms setup for queens so I took a little extra time to be sure I had the dimensions established and screwed the blocks into place so I could handle those. Next thing to cut up is the supports to start forming the headboards and footboards

Cut it up!

Some frames, assembled with pocket screws

Roughing out the headboards and footboards

a stack of frames
The hardest part of the entire build was figuring out how to put all of those drawers underneath the boxes. For both beds, I need the height for the bottom of the boxes to be the same. The rooms have carpet, so you don't want to leave the drawers sitting flat on the floor, you could never open one. So I can start with a 2x4 on the floor running between the headboard and footboard to act like a spacer or toe kick to support the drawers. I'd need another 2x4 on the back side of the casing to support the weight of the drawers. To build the cases, I cut 2x3's to the exact lengths needed, and drilled for pocket screws to get a clean joint. The short pieces are 11" long, I measured the length of the long pieces to create a face exactly long enough to span between the nightstand and the footboard to create a continuous look. Got the height the same way, make a mark between the 2x4 on the floor and the bottom of the bed box. So this took some assembly before really getting these measurements.

I have 2 rows of 3 drawers each, so 6 per side of each bed. That's 12 drawers per bed, 24 drawers total, that should be about the same size. Ideally they should be exactly the same size, but that never happens in handmade furniture. Plus 2 nightstands with a drawer each per bed, and I'm up to 28 drawers total for this project. and did I mention I hate making drawers? I made a storyboard so I could position those short pieces in the frames, and need 3 frames built up per side of the bed, so I built 12 frames.

For the headboard and footboard, I used 1x6's nailed down from the top with a 16ga finish nailer.  Getting everything square and centered was the hard part there, it really came together pretty quick. I also added support braces cut at 45* angles against the center support in the headboard, footboard, and mattress support. That makes a huge difference in stability.

Standing the beds together


Teenager provided to hold stuff and give size reference

the prototype drawer casing is clamped in for a trial
Funny thing, these beds side by side barely fit on my 8' x 12' deck so how can I fit the drawers or build the nightstands on here? Tune in later to find out.

This kicked off really cool. These beds are supposed to be a surprise to the kids for Christmas, so I need to have something ready to deliver on Christmas Eve. at this point, I new I wouldn't be able to finish everything on time, but we'll see how far we can get.