Friday, August 21, 2020

Better Start Digging

 Well now that I have the plan laid out for this sidewalk, I need to finish the dry fit, be sure I've got enough pavers to do what I want to do there, and start grading down for a 4" pour. Also, when I started digging, my wife had got some good ideas. And it's important to listen to your wife, because she only has good ideas, right? right?? These actually turned out to be amazing ideas. I wanted to add some drainage below the rain chains, so I need to set those drain lines before pouring the concrete. She wanted to add on a couple of exterior outlets and some low voltage landscape lighting. I found where we could run a power line out through the downstairs bedroom wall, then ran low voltage from there. She wanted outlets on each side of the stairs to be able to plug in Christmas lights that she puts out on the knee walls, so I added a switch for those as well. And we got another continuous outlet on the inside of the front porch as well! The electrical is the sizzle on this steak, but you have to plan and bury that conduit first, before pouring concrete. 

First drainage ditch

Starting to form the front feature

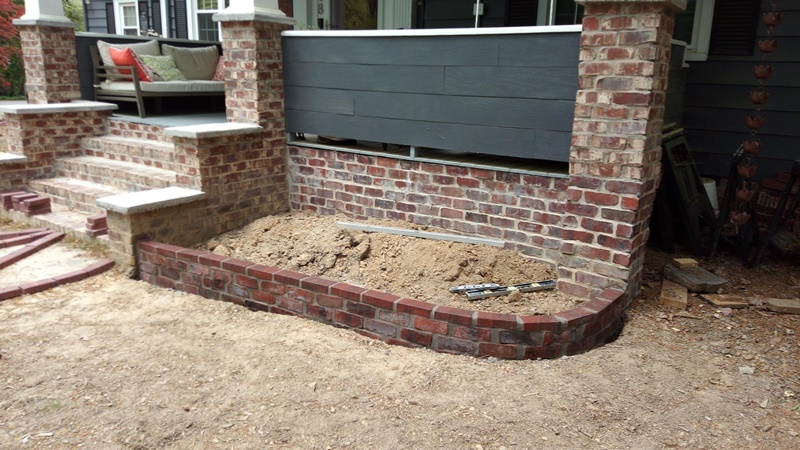
Grading the curved feature

Starting the other drainage ditch


Putting conduit across the front of the stairs. This will be buried in concrete

New raised bed gets a switched outlet and conduit to the inside of the porch

Left of the stairs gets a switched outlet and the switch

That's the switch

It's a long run to the wall mount

One sweaty electrician!

Concrete - wishful thinking

Buried and wired up


(not the actual feed wire - turned out dead)

Conduit for low voltage

The other conduit for low voltage

First drain is going in! Some perforated for capturing gutter runoff, some perforated for the leech field


The other drain line, now with more gravel

I covered the perforated drain line with some leftover roofing felt I had in the shed, and it's in a gravel base. This should keep the dirt out and let the water disperse. The drain line gets covered both with concrete and dirt. The rain chains will shed water into a box that these lines are connected with, and the water should leech out. After some testing (read: rainstorms before I got it covered) I had to add a longer drain line to the left side. This one in the last picture is always fine. This helps keep water running away from the house even as I reduce the amount of permeable surface. 

Up next, more electrical! and concrete.

Wednesday, August 19, 2020

Planning the new sidewalk

 I knew when I built those stairs in front of the porch that the landscaping would have to start with a sidewalk that runs from the driveway to somewhere else. After it was built I figured the sidewalk should go all the way up to the shed, and have a nice feature in the center of the stairs. So I wanted to start planning with that and get some fair curves for the rest of the sidewalk.

Starting with one idea for the center feature (I liked others better)

Going from the driveway to the stairs

that's not a fair curve

This is getting better

Wrapping around to the shed.I want to put in drains as well.

This is just a rough outline. I still need to fair the curves and do a crap ton of digging. and I do mean a crap ton. I'm going to pour the concrete first, to grade, then grade the yard down and remove the rest of that stone walkway you can see in the last picture. This is going to really transform the yard!

Monday, August 17, 2020

More Brickwork

 I didn't expect to lay any more bricks anytime soon, but in landscaping you have to be prepared for everything I guess. We were visiting with my father-in-law when his wife gave me a great idea for a raised bed! It starts with a trench.

Outline for the trench

And now it's an actual trench!

Poured a footer and the first course (below ground) with no mortar in between. This lets water weep out


Got a few more courses and pavers on top!

This cute wall turned out great

Now we have a nice raised bed outlined! This small wall turned out really cool. I wish I had the right type of saw to cut miters in the curved part. This is my first time building a curved brick wall. I think it turned out pretty good.

I'm going to add a sidewalk and wanted to build this wall around planning for that other project.

Filled with potting mix & compost ready to plant

and..... planted. Lariope, shrubs, flowers, and a foxglove for accent


Friday, August 14, 2020

It's time for some landscaping

 BRING ON THE LANDSCAPING

Finally I'm getting around to doing something with the yard in front of the new porch. After finishing the porch last August the yard around it has been a mud-scattered wasteland for months. I know what I wanted to do with the yard, defining some bed, grading down some beds, and pouring some concrete. 

I want to start by outlining a curved sidewalk

Sidewalk should run from the driveway to the shed with a center feature in front of the stairs

Going back to the shedAdd caption

Notice the bare mud and lack of grass. Also the grade where the mud hits the stairs


There is still plenty of stone walkway to tear up

I had to dig up a bunch of that stone walkway

Next time to dig an outline of the pathway and till up the grass

Tulips are annuals in the south, these were beautiful

One potential brick pattern - fill in that with concrete

I also thought about a running bond pattern like this

One option for the feature at the end of the stairs

It all starts with sidewalk planning. The sidewalk defines the beds, fill in everything else with grass.

Tuesday, August 11, 2020

Working up these small tables

 I've been working through how to get the bases together for these small tables. 

I attached this base using pocket screws to the top

These bases will go together with a drawer for each table

I cut a couple of coasters out of a scrap walnut piece - had a cool grain pattern


The tops finished out pretty clean, I thought

I tried to fill in some low spots in these tops with epoxy, and it bubbled. Tried to smooth it out, cover it up, nothing. Eventually after I got the bases attached to these tops I took the power planer to it and came out really actually clean. 

Couple of drawers without their faces


coasters. I made coasters. didn't see that one coming

Got the bases put together!


Got the faces attached, and the drawers actually fit


These tables turned out great. Now if this damn pandemic would ever end I can get them back down to my cousin in SC. He's going to love them, and I think they turned out really great.