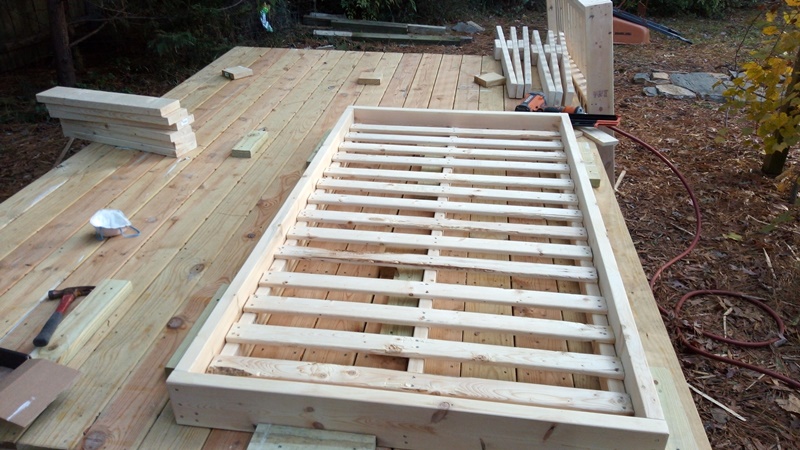
The second sale from the craigslist ad was for a twin over twin bunk bed. They also wanted a slide, like the first sale, and they also wanted a climbing wall. No real clue how I'm going to build a climbing wall, but I guess you just order some holds from amazon and attach to a 2x6 wall. Since it's time to build a slide for the first one, I can buy the lumber for both and build both slides at the same time.
 |
| I started by cutting the angles, then added a groove to hold the plywood |
 |
| One assembled slide |
 |
| Storing the beds in the shed |
 |
| that's a full shed! |
 |
| I assembled the twin frames for the next bed |
 |
| added supports for the slides |
The back of the bed always ends up against a wall. The client actually found a dimension where the slide should end 107" from the wall, so I ran with it. For the 2nd client, the slide actually had to go through a doorway (it was a tiny space) so I made the supports 6" shorter and the slide 5" shorter. spoiler alert, that worked out perfect.
I started by staging a 2x6 scrap on the deck 107" away from the back of the bed, then stacked another 2x6 on top of that and the frame 2x6 to the right height of that. It gave me an angle to cut the 2x6 sides (all 4 sides). Once I had the angle drawn once I transferred that to all 4 sides and leaned the table saw blade over to that same angle. Then I ripped a 2x6 and a 2x4 to put that angle on the sides of the blocking. I used the 2x6 on the side that is going to sit on the floor, and again the angle is cut so that the 2x6 should sit flush on the floor and the 2x4 creates a plumb fit against the top bed frame.
After cutting those 2 blocks I was able to mark the sides where the top of the blocking should sit. Connect those two dots to form one line, and use a scrap of the plywood to get the thickness for the other straight line. Be sure these lines are straight. Set the circular saw blade to a depth of half an inch and hollow out between the lines, creating a groove for the plywood to sit in. I cut the plywood into about 19" wide, then marked and cut the length after I knew the final length of the sides. I used the finish nailer to attach the plywood to the sides and top & bottom blocking, then later added 2x3 scraps underneath the plywood spaced 16" on center like it was a wall. This creates a solid surface that is sturdy enough for adults to slide down.
But before you can actually slide the surface has to be smooth and safe. I sanded the plywood first with 80, 120, and 180 grit sandpaper to get smooth. Then to prevent splinters I used TotalBoat epoxy to seal the plywood. I found a company called
Jamestown Distribution that had the best price (not an affiliate link). I got the 5:1 epoxy, slow kit, in the gallon size because I want to use this stuff for some fills in some tables I'm working on, and on my boat when I actually get back around to working on it. The pump that comes with the kit gives you the correct 5:1 mix of resin and hardener, so to use it you put one full pump of the resin, add one full pump of the hardener, and mix for about 2 minutes with a stick. Pour it out, and spread around with a plastic scraper or something, and it will spread itself evenly.
 |
| there was an extension for this pump |
 |
| funny, this is the right size. |
 |
| One slide with epoxy, one slide without |
 |
| funny how I'm having to work on these things while the shed is full of beds |
This type of epoxy does not have any UV protection built in, meaning it's not supposed to be a finished coat. It cured kind of sticky and then got really hard, and I topcoated with Kilz primer then an exterior paint. Actually I did both beds in exterior paint because that stuff is just indestructible. If the kids take crayons to their bunk beds you can flat out turn the hosepipe on these things.
Now these slides are a really cool part of the build options, this turned out to be a really fun thing to figure out. And it's $120 if anyone else wants to add on onto a bed