Monday, January 3, 2022

Gina's Hanging Daybed

 My best friends finally said they wanted one of my hanging daybeds to be included as part of their first floor remodel that included adding a front porch. They picked out that Spanish Oak color from Old Masters Finishes, as the black tint worked with the color scheme of the porch. Joe is an engineer (albeit, electrical engineering) so he designed the hanging system and that thing was rock solid. This bed turned out amazing, I've made dozens of these and this is by far my favorite one. It's a twin size but she ordered custom cushions, and they all love it.

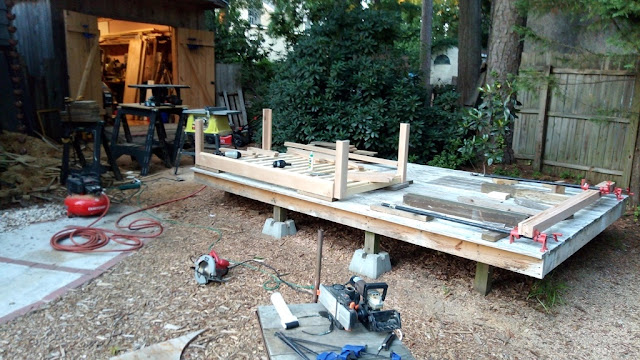
It starts with a base and a crap load of oak


Add arms and a back


One stained runner


So if you've ever wanted to see exactly how I build these things, that's how it's done from start to finish. And here's the end result:


Installed! It's a perfect fit

They love it


Saturday, January 1, 2022

Chris Helped

 My boy Chris came by to learn carpentry. He loved it, and he's a natural with the math background and inquisitive, puzzle solving mind to thrive in this hobby. We built a bunch of stuff, started with some camping crates, built a table & shelf into the back of his car, then went to the house to add a triangle shaped pergola to their back deck. Lots of cool there, and I'm glad he was able to pick it up quickly.


Then we added framing and a clear roof


 Chris and Claudia both loved it. She added a mosquito screen after we were done with the carpentry. This does not leak and provides some cover for their outdoor space while not blocking out the light.

Friday, December 31, 2021

Shelves for Ella

 My daughter wanted some extra storage in her room, so I whipped up some quick shelves. I had some 1x6 oak laying around, and some Spanish Oak stain by Old Masters leftover from another cool project. Add polyurethane and some stylish brackets, and I'm really pleased with how these turned out!


This took a lot of epoxy, still not sure I got it safe


I started with rough sawn oak, cut the boards to length, ripped the sides to width, then plane the faces flat. Once you're dressed all six sides, sand through the grits (80, 120, 180, 220, 320) and add the stain. This was a wiping stain, I love Old Masters products. Brush it on, wipe off 5 minutes later and that white oak is suddenly almost black.  Add a few coats of polyurethane and install the brackets. I found the brackets on Amazon.

She loves them! Who says you can't make teenagers happy?

Thursday, December 30, 2021

Banner Elk Update

 As we settled into the Banner Elk townhouse there was a need for a ton of updates. While I still have a long way to go, there are a few to start with. 

First, we got the fraud bed installed on the back porch. I had to cut off some scrap 4x4 PT posts to make legs for the bed, and attach those. Then cut off the existing hanging boards to make it fit in the space.


Complete with teenager

We also hung the TV on the wall. This is really cool.


Kelley had an idea for the bathroom, she found it on Pinterest. I liked it, so I built it. Basically we just replace the cabinet with some walnut shelves and a sink that sits on top. I have to start by gluing up the walnut panels

It starts with raw walnut

Rough cut to length, table saw to width, plane everything flat

Add biscuits and glue up the panels

Epoxy fill the knot holes

Large panels ready to use, these are about 23" deep and have a live edge front


Did another panel for a desk in the bedroom (below)

Before - cabinet

During? no cabinet

After - add live edge walnut panels, sink, faucet

Finito

These were all good additions to the townhouse. That bathroom especially turned out better than I expected. It was a great idea, and I had fun building it!

I work from home, so that really means work from anywhere. Here's the nook where I put a shelf to use as a work desk when I'm in the mountains with that other panel.


My brand on the shelf - Handmade by John Flynn


Finally, sometimes we bring the cat with us up there if we're going to be in the mountains for more than a few days. We needed a clean way for the cat to get to the top of the bunk beds, so I built a cat kingdom. Kelley found some old carpet at a thrift store so the cat can scratch and climb easily.


Now with some carpet

Installed


Notice how the cat kingdom overlaps the bunk beds - I measured that from memory!

These all turned out really great, but that's not the only custom stuff I had to build for this place. The tables are up next.