Monday, September 6, 2021

Let's build a shed!

 On the land in Boone, step 1 is to build a shed after I staked out where I wanted to put the house. There is a post script to that shed, but it starts with building it.

Loaded down and ready to build

The blocks beside the driveway are where we're going to build

It's a build site!

Blocks are in the ground


Floor framing is on and leveled


Now with more subfloor!


First wall is standing


2nd wall got sheeted before standing

Now with more walls


Carpenter up!


Cut the roof rafters and stood up the ridge beam


I covered this in tarps because I ran out of time to finish getting the roof put up and it was supposed to rain. See tomorrow's post for the result of that haha

This was Easter weekend so I had a long time to get this done. The trick was that Lowe's was closed for Easter Sunday, so I lost half a day when we ran out of supplies. I used a generator to run the tools for the first time and that worked out very well until I ran out gas. We got an airbnb for the long weekend so I could get out and build this with Kelley, her mom stayed with the kids. It went up pretty quick and I'm pretty happy with the way this part turned out. In the end, the ridge beam is pretty warped so I had a really tough time getting a flat roof haha

Friday, September 3, 2021

Small Butcher Block

 So I forgot to post anything for the entire month of August. I call it Hell Month, because I can't stand the heat so I tend to shrink down into my own pit of despair for a while. At least now it's September, and I'm still writing about projects that I built in March. Yeah, I'm behind on a lot of stuff.

That's a lot of clamps!


Finished product

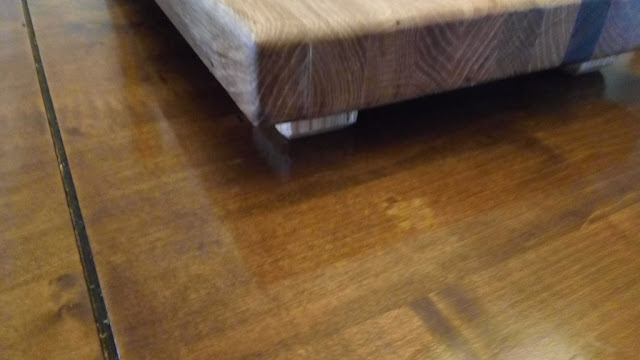
I added some feet!


To make these, I start by planing a bunch of boards to the same thickness. They have to be exactly the same thickness to get the look right - then I rip them on the tablesaw to 1 7/8" wide. Apply glue liberally to the faces of the boards, and get them in the bar clamps. I use the boards with the grip clamps to keep the top & bottom of the boards aligned. 

After the glue cures, run the board back through the planer to get the top & bottom perfectly smooth. Trim the sides first. Then when you get all 6 sides clean, run the corners through a roundover bit on the router. Then I made some feet out of a scrap strip and glued those onto the bottom. 

Finishing the block starts with sanding through every grit - 80, 120, 180, 220, and 320, then I rub some Butcher Block Conditioner on all surfaces. It usually takes 2 coats of the conditioner, that's an oil and wax mix so it takes a while for the first coat to soak in.

I tried to sell this one, but we ended up taking it up to the mountains when it didn't sell after like 3 months. Kelley loves it!

Friday, July 30, 2021

Couple of table tops

 I got contacted about building a custom table top, so I glued up this panel to the size requested, got it finished (sand, stain, poly) and shipped out. Pretty straightforward, but they turned out great. I actually missed the size on the first one, so I got to keep a table top for myself and make his to ship out.

It started out with a board


Glued up a couple of panels


This one turned out great, but too narrow. I rounded the corners and I'm keeping this one

The square one is the right size


Went with a Spanish Oak stain, this wiping stain gets much lighter after

After

Clear


So the finished product, after gluing the panels up to the right size, started the finish work. I put a roundover on the edges, sanded through 80, 120, 180, 220, and 320 grit paper, then applied the stain and wiped off after 15 minutes. Finally put several coats of wipeon polyurethane and these table tops were good to go. One went to texas, the other is getting a base built soon. really.

Wednesday, July 28, 2021

Washing Machine Stand

 Banged out a quick washing machine stand for a friend. Straightforward construction lumber and plywood, turns out she wanted one for the dryer too but I totally missed that. 


Tuesday, July 27, 2021

Starting an Oak Bed

 This was for my good buddy Shawn, he bought some bunk beds last year and has since asked for a king bed like this one. This one is a queen that ended up going to his son! The design is my own, and it turned out fantastic.

It started with one cut, a great curve. The top goes to the footboard, and the bottom becomes the top of the headboard

It took forever to get all of this stuff through the planer

Starting layout for the headboard

It started out like this

How did it end up like this?

Had to bend a couple of boards to get the curve on the headboard

Forming the footboard


There's the top half of that curve cut


Stained the rails


He wanted a really tall bed, the kid was 6'4" at only 14 years old, so I put this one 20" up off of the floor instead of the usual 12.5". The idea was to cut a curve into a board, and use the top of the board for the footboard accent curve. The bottom from the cut established the curve of the top of the headboard, creating a mirror effect. I then bent a few boards over the top of the headboard, used the same accent over the footboard, and filled in the field with oak.